


Accurately measure existing side window and assess body shop areas for compatibility and aesthetics. Gather tools: new window, putty knife, vacuum, safety gear, drill, heat gun, extra glass. Prepare workspace, remove old window, clean frame, install new pane, seal & caulk, reinstall hardware for secure, functional fit.
Are you ready to transform your home with a simple yet impactful upgrade? This comprehensive guide is tailored for beginners aiming to tackle their first DIY project: side window replacement. From assessing your needs to installing new windows, we’ll walk you through every step. Learn how to gather the right tools and materials, navigate potential challenges, and enjoy enhanced energy efficiency and curb appeal. Get ready to master the art of side window replacement!
- Assessing Your Side Window Replacement Needs
- Gathering Tools and Materials for Success
- Step-by-Step Guide to Installing New Windows
Assessing Your Side Window Replacement Needs

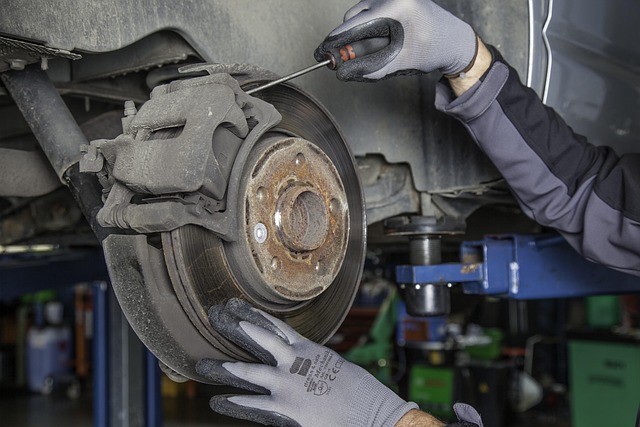
Before diving into the DIY process, understanding your specific needs for a side window replacement is crucial. Different vehicles have unique window designs and sizes, so measuring the existing window carefully is the first step. Take note of any unique features or mechanisms that require reproduction to ensure compatibility. This may include power operation, automatic functions, or specialized locks and seals.
Assessing your side window replacement needs involves considering factors beyond just the glass itself. Think about the overall condition of the vehicle body shop where the window will be installed. Minor dents or scratches in the surrounding area might need attention during the restoration process, similar to how a car restoration project might include fixing a dent repair. This ensures a seamless fit and an aesthetically pleasing finish once the new side window is in place.
Gathering Tools and Materials for Success

Before tackling any DIY project, having the right tools and materials is key to success—and side window replacement is no exception. Start by gathering essential items like a new side window, a putty knife for sealing, and a vacuum cleaner for a clean finish. Don’t forget safety gear, such as gloves and goggles, to protect against debris and sharp edges. For vehicle body repair and auto glass replacement, consider adding tools like a drill with the appropriate bits and a heat gun to make the process smoother. Additionally, have a few extra pieces of glass on hand in case of any mishaps during installation, which can be just as crucial as the initial preparation for a successful side window replacement project.
Step-by-Step Guide to Installing New Windows

Replacing a side window is a common home improvement project that can be completed successfully with the right tools and a step-by-step approach. Start by gathering all necessary materials, including the new window pane, sealant, caulk, and any required hardware. Ensure your work area is well-lit and clear of debris for safety and precision.
Begin by removing the old window carefully, taking note of how it was installed. Next, clean the frame thoroughly to ensure proper adhesion of the new sealant and caulk. Insert the new window pane, aligning it precisely with the frame. Apply a bead of sealant around the perimeter, following the manufacturer’s instructions for curing time. Once set, apply caulk along the edges, smoothing it out for a watertight seal. Finally, reinstall any hardware and check for proper functionality and security.
Upgrading your home’s side window replacement is a fantastic way to enhance energy efficiency, reduce noise pollution, and improve indoor air quality. With the right tools, materials, and a simple step-by-step guide, you can achieve professional results without breaking the bank. Now that you’re equipped with knowledge from this beginner’s guide, it’s time to roll up your sleeves and embark on your side window replacement journey, transforming your home’s landscape one pane at a time.